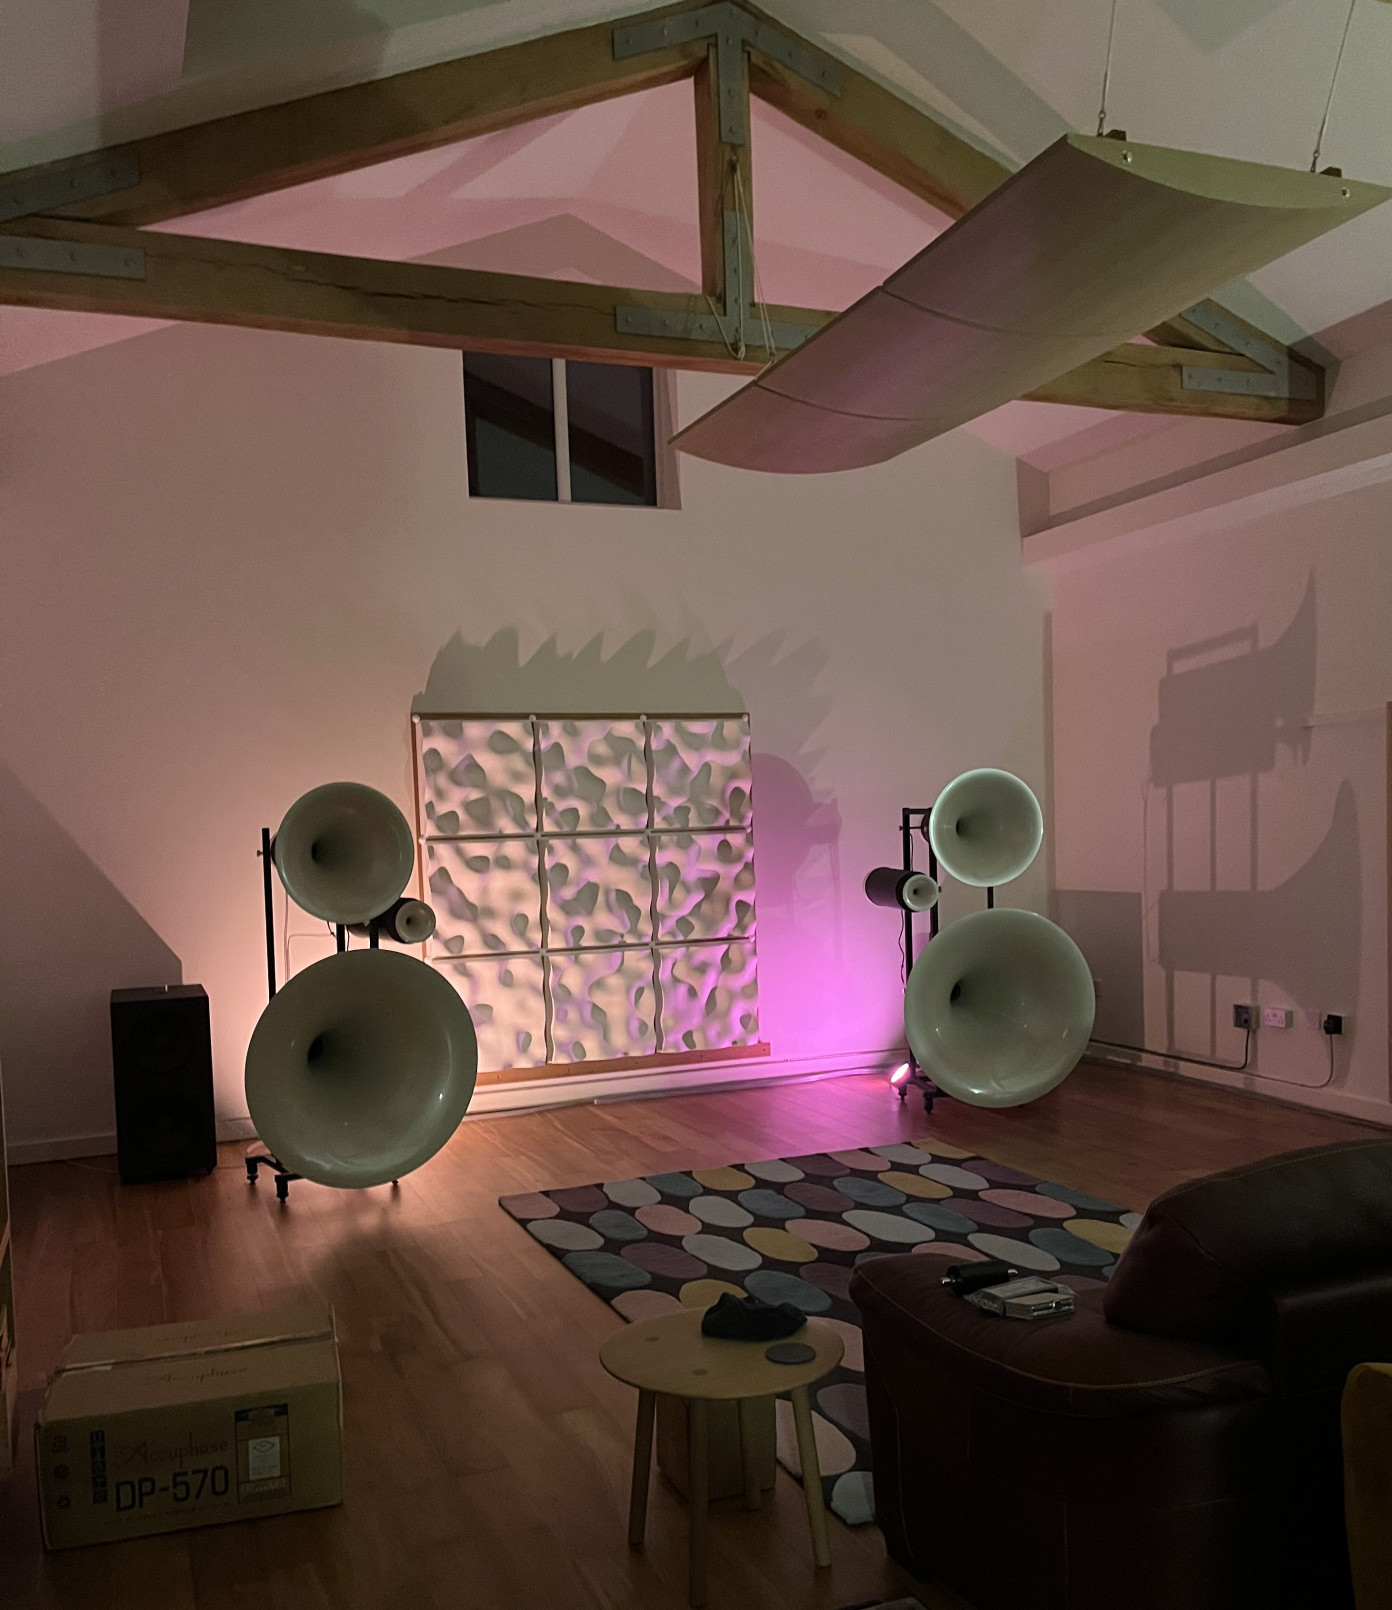
One way to achieve symmetrical speaker set-up.
By Roy Gregory
While laser levels and range-finders have become a familiar part of speaker set-up, like any tool, the range of ways in which they can be applied – or more often, mis-applied – seems almost limitless. Walk around any audio show on set-up day and you’ll be dodging laser beams, fired with apparently aimless abandon, in every direction possible. In most cases, they seem to achieve little beyond achieving equal height in space or distance from the listening seat and, while those things can be useful – at least, if executed accurately – they don’t even scratch the surface of what’s possible. And if the industry is confused, pity the poor end-user who, judging from the number of questions that appear in the Gy8 inbox, are generally mystified as to why you’d use a light-beam rather than a tape-measure.
Having had to recently re-set a pair of positionally demanding speakers – early model Avantgarde Trios – I took the opportunity to document the process: at least – my process. There are doubtless other approaches and more refinements that might be applied, but here’s something that works, consistently and is proven with a whole range of different products and system contexts.
It’s worth noting that symmetrical set-up is far from the be-all and end-all of speaker positioning. For starters, few rooms are genuinely symmetrical and what we are working with here is the relationship of speakers to listening position and speakers to room. However, the fact that we are working in stereo, looking to seamlessly blend the output of left and right speakers makes symmetrical set-up a more than useful starting point in most cases – even if the system is not sited symmetrically in the room.
First things first…
Unlike in science fiction, the laser is not some all-powerful device that slays or renders obsolete all that goes before. With enough care and patience, you can achieve everything described here with painter’s tape, a fine-line Sharpie, steel rules and high-school geometry. The lasers don’t do the job. They just make it easier and, if done properly, potentially more accurate. Lasers? Again, this gets a lot easier if, like any tool, you select the right laser for the right function. In this process, the lasers point the way, but you’ll still be using rulers, painter’s tape and a pen to mark way-points along the path.
Meet the team…
You will need both a range of different lasers and various ancillaries to help use them to best effect. I’ve already mentioned painter’s tape, tape measures and a marker pen. The full list looks more like this:
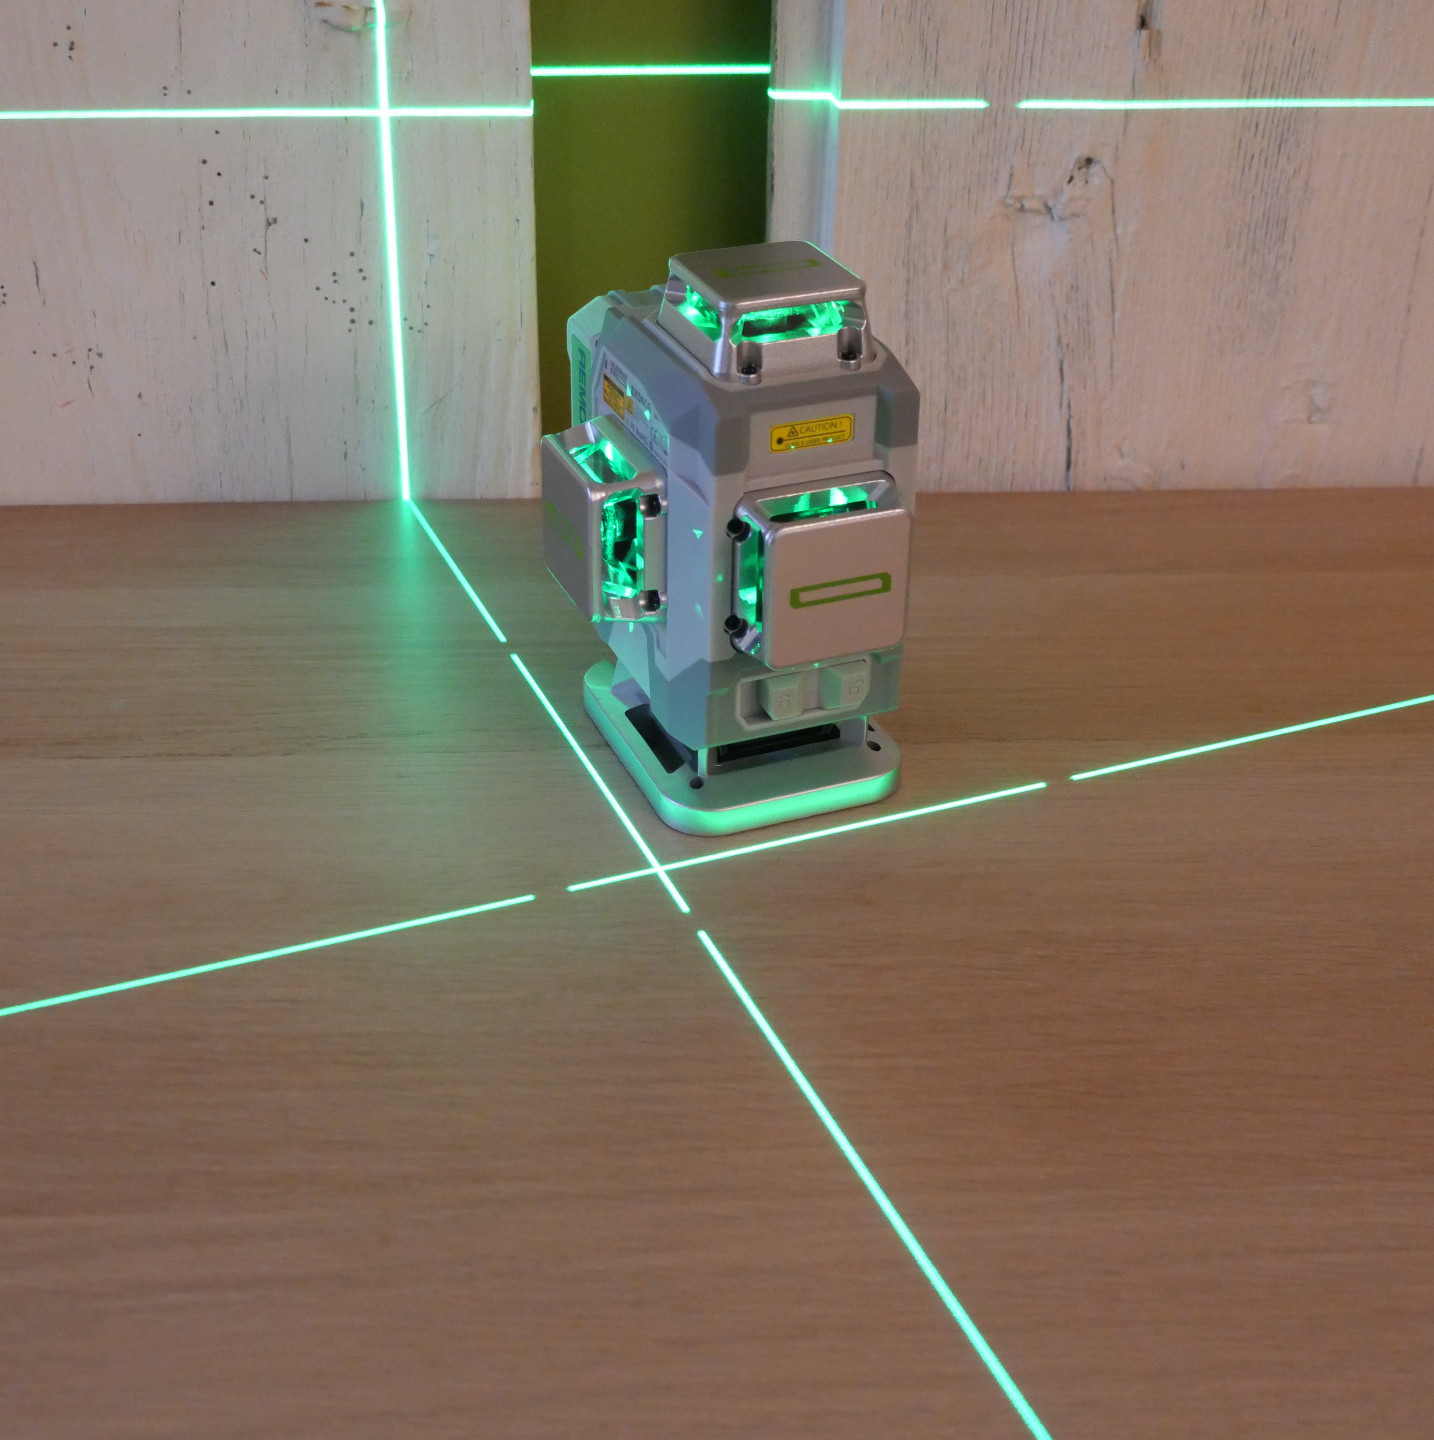 A 4×360 laser capable of throwing laser lines ahead and at right angles simultaneously. I use the Huepar Pro ZK04CG (the ZK04CR throws red lines rather than green, if you prefer).
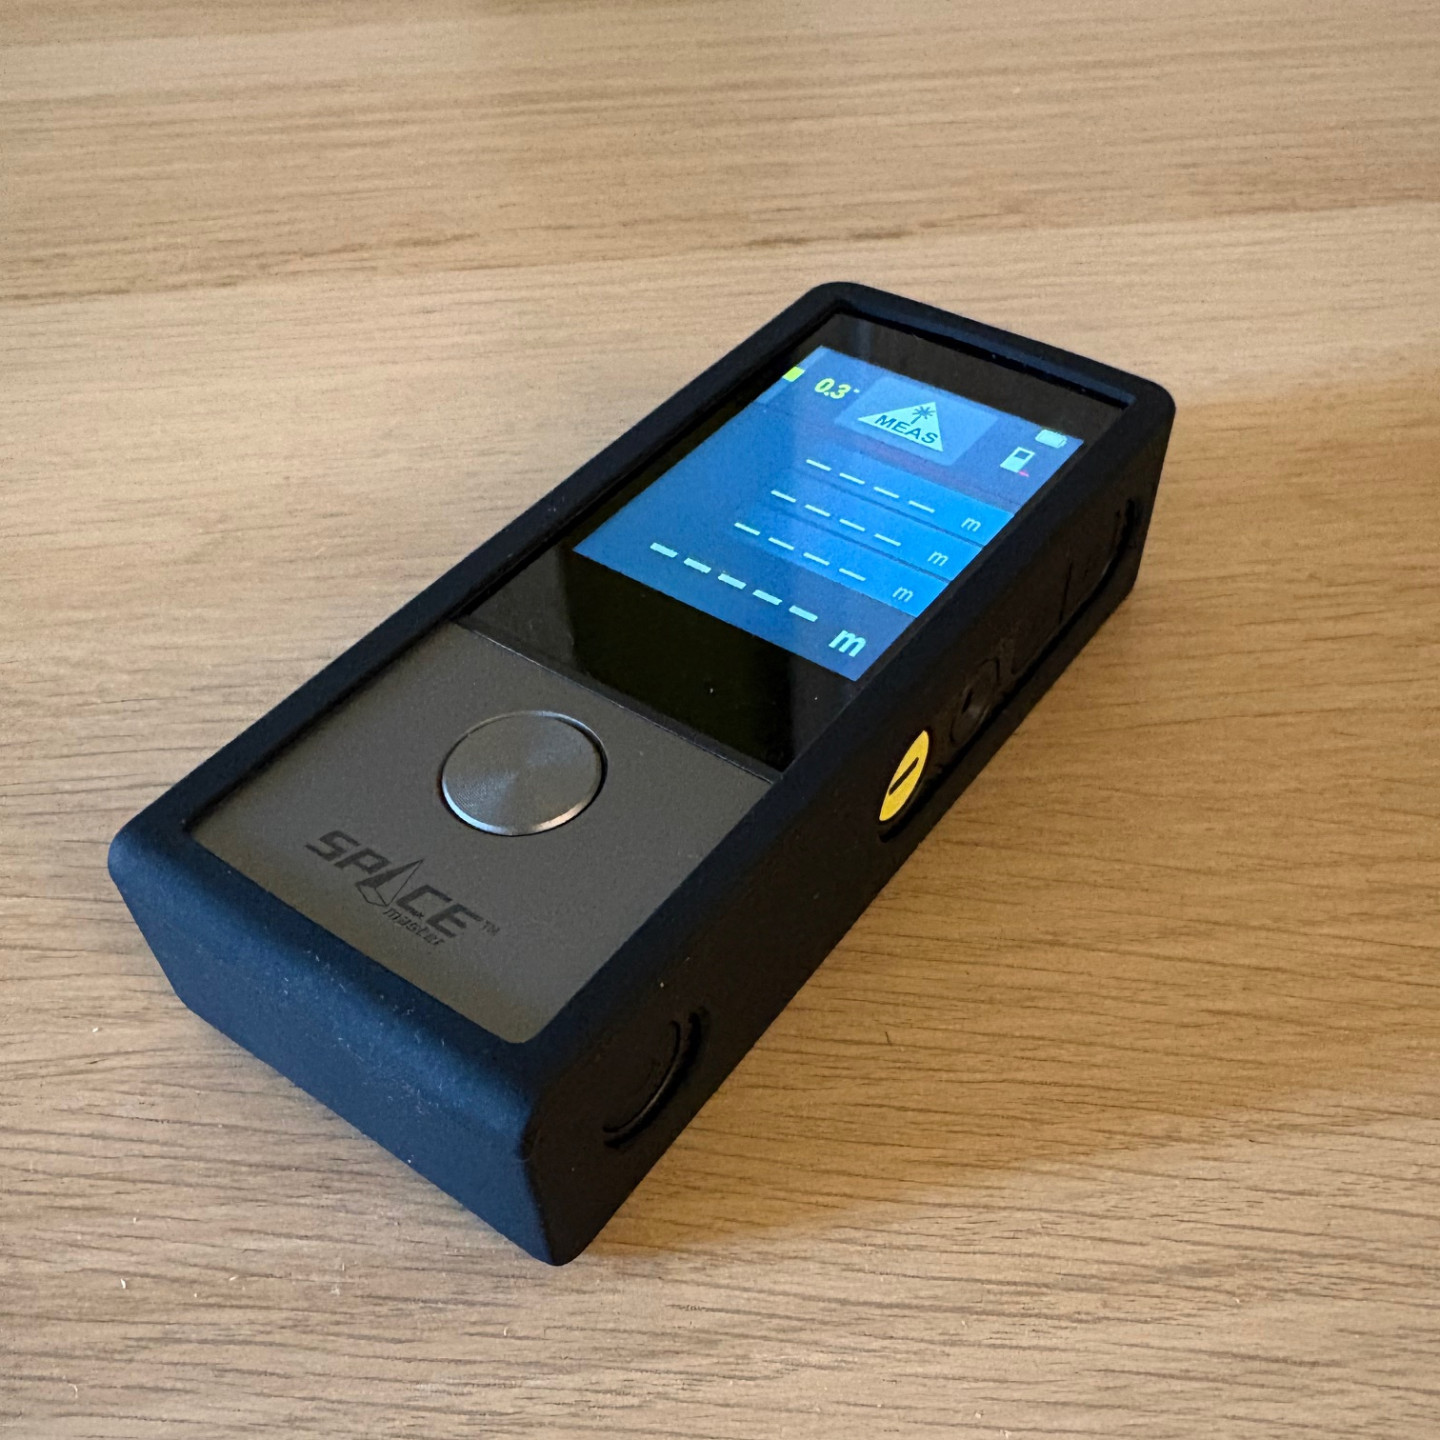 A laser range-finder, equipped with a ¼” thread for tripod mounting. While laser range-finders are cheap and plentiful – you try finding one with that ¼” mount! I use the Mileseey D9 Pro Space Master.