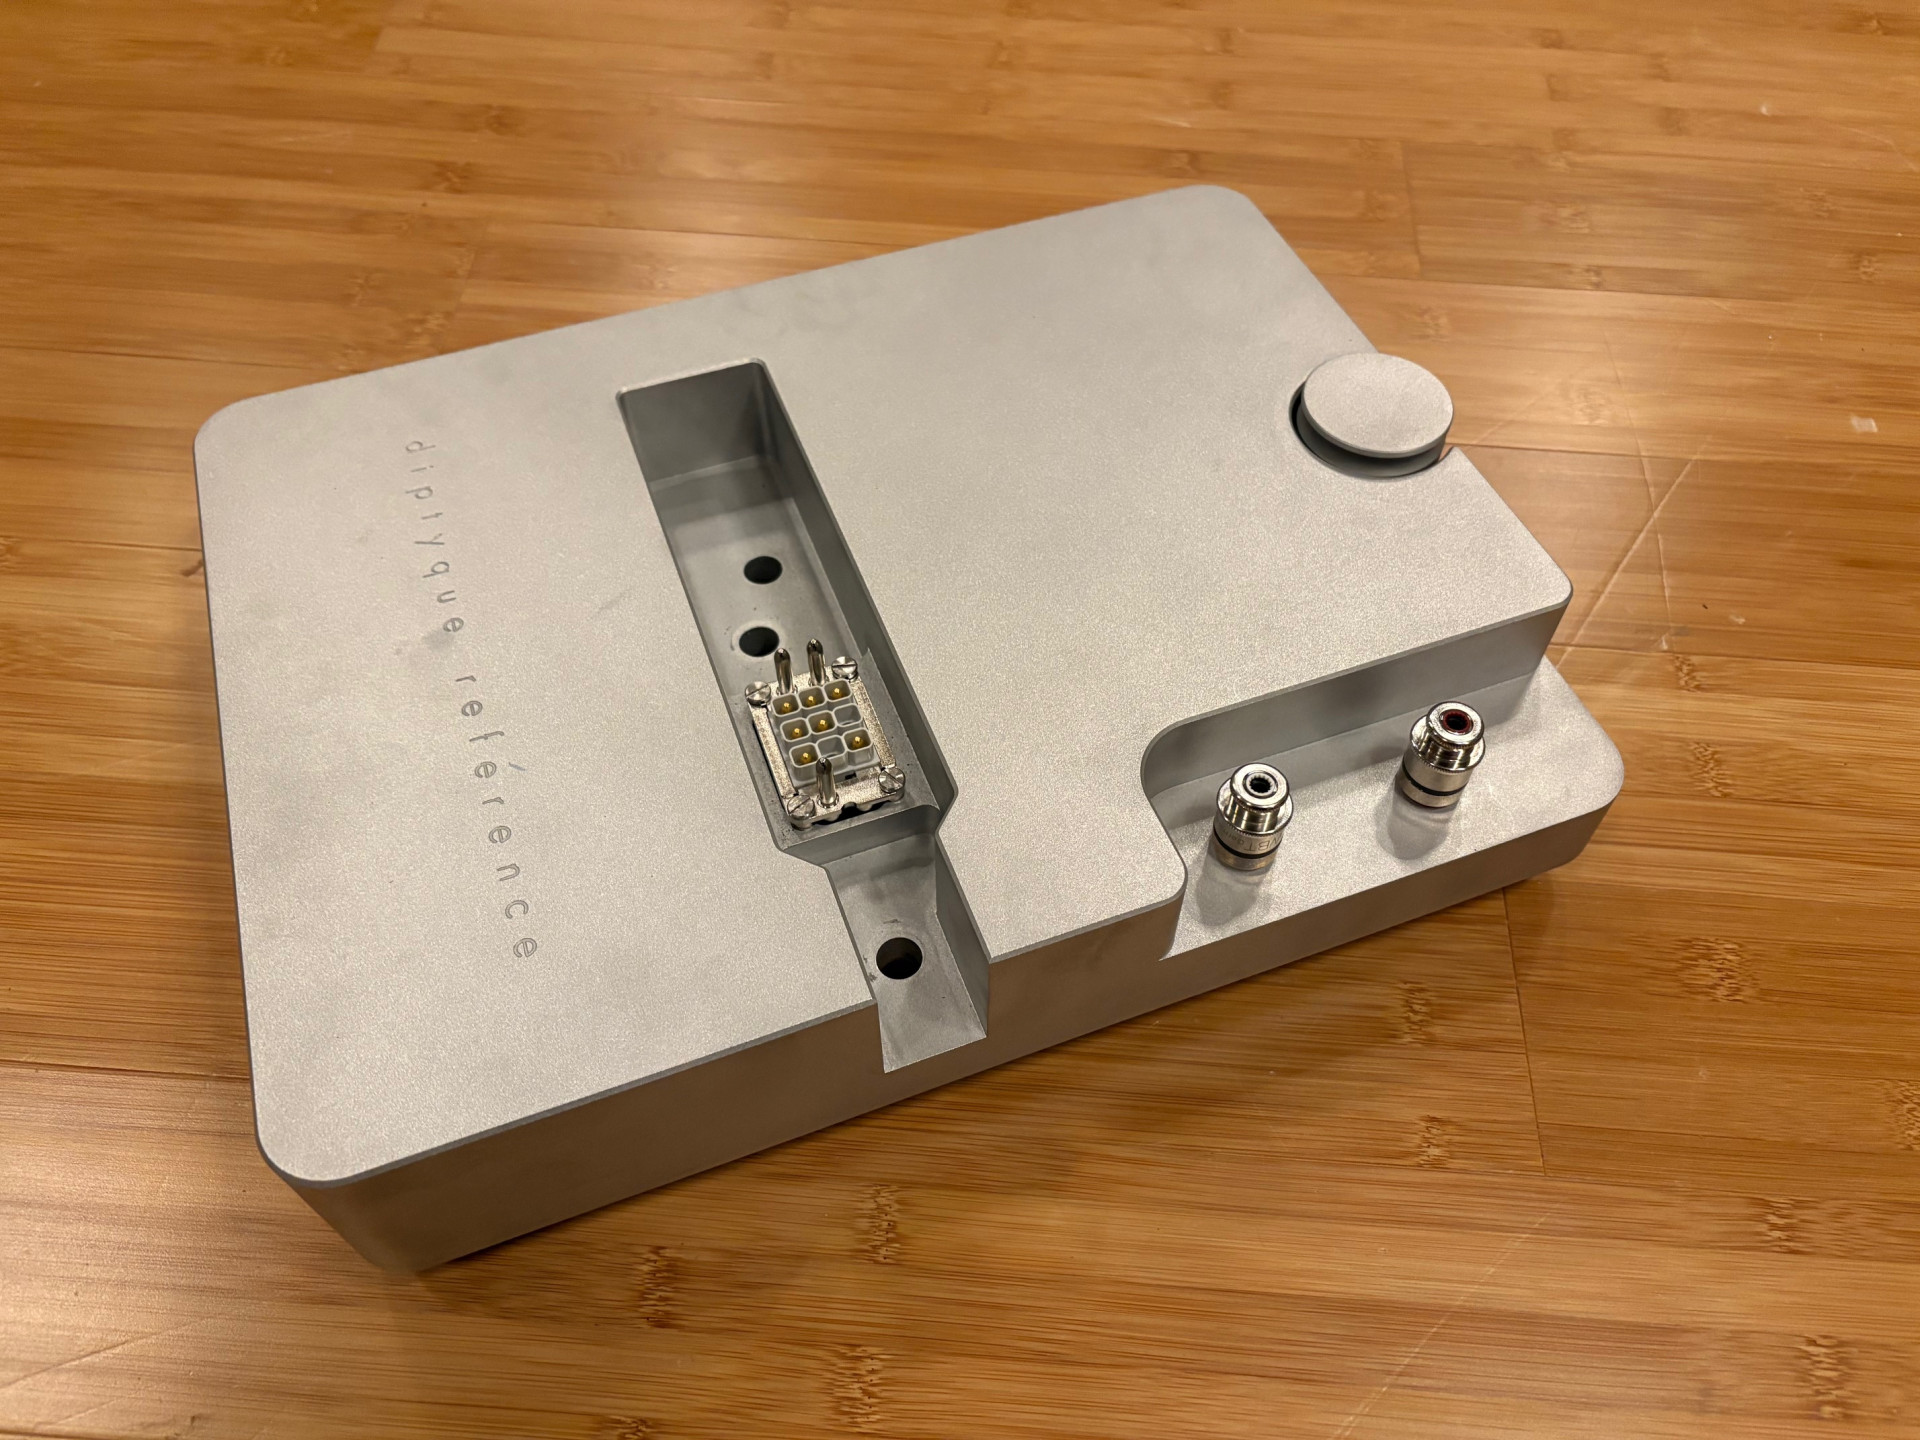
Unpacking is as simple as taking the lids off of the crates, flipping aside the protective fabric and lifting the panels clear of the box. One person at each end will be plenty. Just make sure that you’ve got a carpet or protected surface on which to stand the panel, on its long edge. Each panel is supported by a solid, cylindrical aluminium foot under the outer end, a large block under the inner end, beneath the mid and treble drivers. This weighty block is also machined from solid aluminium, pocketed on the underside to accept the crossover components. It is electrically connected to the drivers by a small, upward facing terminal block, with seven substantial gold-plated contact pins and three, even larger locating rods. Mechanically, it’s help in place by three large allen bolts that screw vertically though the foot and into the base of the panel – hence the need to place the panel on edge for assembly. With the foot attached, you simply have to stand the speaker up and place it. The finished structure is remarkably stable, given its vestigial profile, but the combination of its weight and painted finish makes it tricky to get a decent grip on. If you need to move the speaker much more than a foot, either slip a skate under the raised central portion (making sure that it can’t flip sideways on you) or use lifting straps. Either way, it’s a two-man operation.
Hooking the speakers up is incredibly easy, given the accessibility of the terminals. It’s also worth mentioning the ease with which they go together, a function of their modular nature. Imagine a situation in which you need to replace or repair a crossover: maybe you want to move to a bi-wired/bi-amped set-up (of which more later), or maybe an upgrade becomes available. Simply exchanging/replacing the crossover blocks is a matter of moments. But that modularity extends far further than that. Take a look at our recent visit to the Diptyque factory (https://gy8.eu/blog/visiting-diptyque-audio/4/) and you’ll see that the panels themselves are also modular, each drive unit being a separate, lift out sub-assembly. In the case of driver damage – as with all planar-magnetics, normally the result of physical insult rather than over-enthusiastic use or an amplifier melt-down – a pair of replacement drivers can easily be shipped and installed in-situ. Inherently robust, the Diptyques are also incredibly serviceable.
Perfect placement…
Once the speakers are built and placed roughly where they’ll live, the fun really begins. As I’ve already suggested, their operational principal and physical nature brings its own priorities and concerns when it comes to set-up. The relevant factors are:
Their di-pole nature.
The fact that the mid and treble drivers act as line sources.
Their height.
The first and most significant difference between the Diptyque Reference II and a ‘more conventional’ box speaker of equivalent price and bandwidth – Diptyque claim useable, in-room response for the Ref IIs that extends down to 22Hz – is the distance they demand to the rear wall. Because di-pole designs throw as much energy backwards as they do forwards, they generate an acoustical effect known as comb filtering, in which the back-wave is reflected from the rear-wall, travelling forward, out of phase, to interfere with and cancel specific frequencies in the forward output. Which frequencies depends on how close the speaker baffle sits to the wall. The shorter that distance, the higher up the audible range the cancellation effects extend and the more intrusive they become. In the real world, that means that you’ll need at least a metre behind the baffles, one-and-a-half would be better and two metres or more would be ideal. In the music room here, we are running the speakers at almost three-metres from the rear wall.


